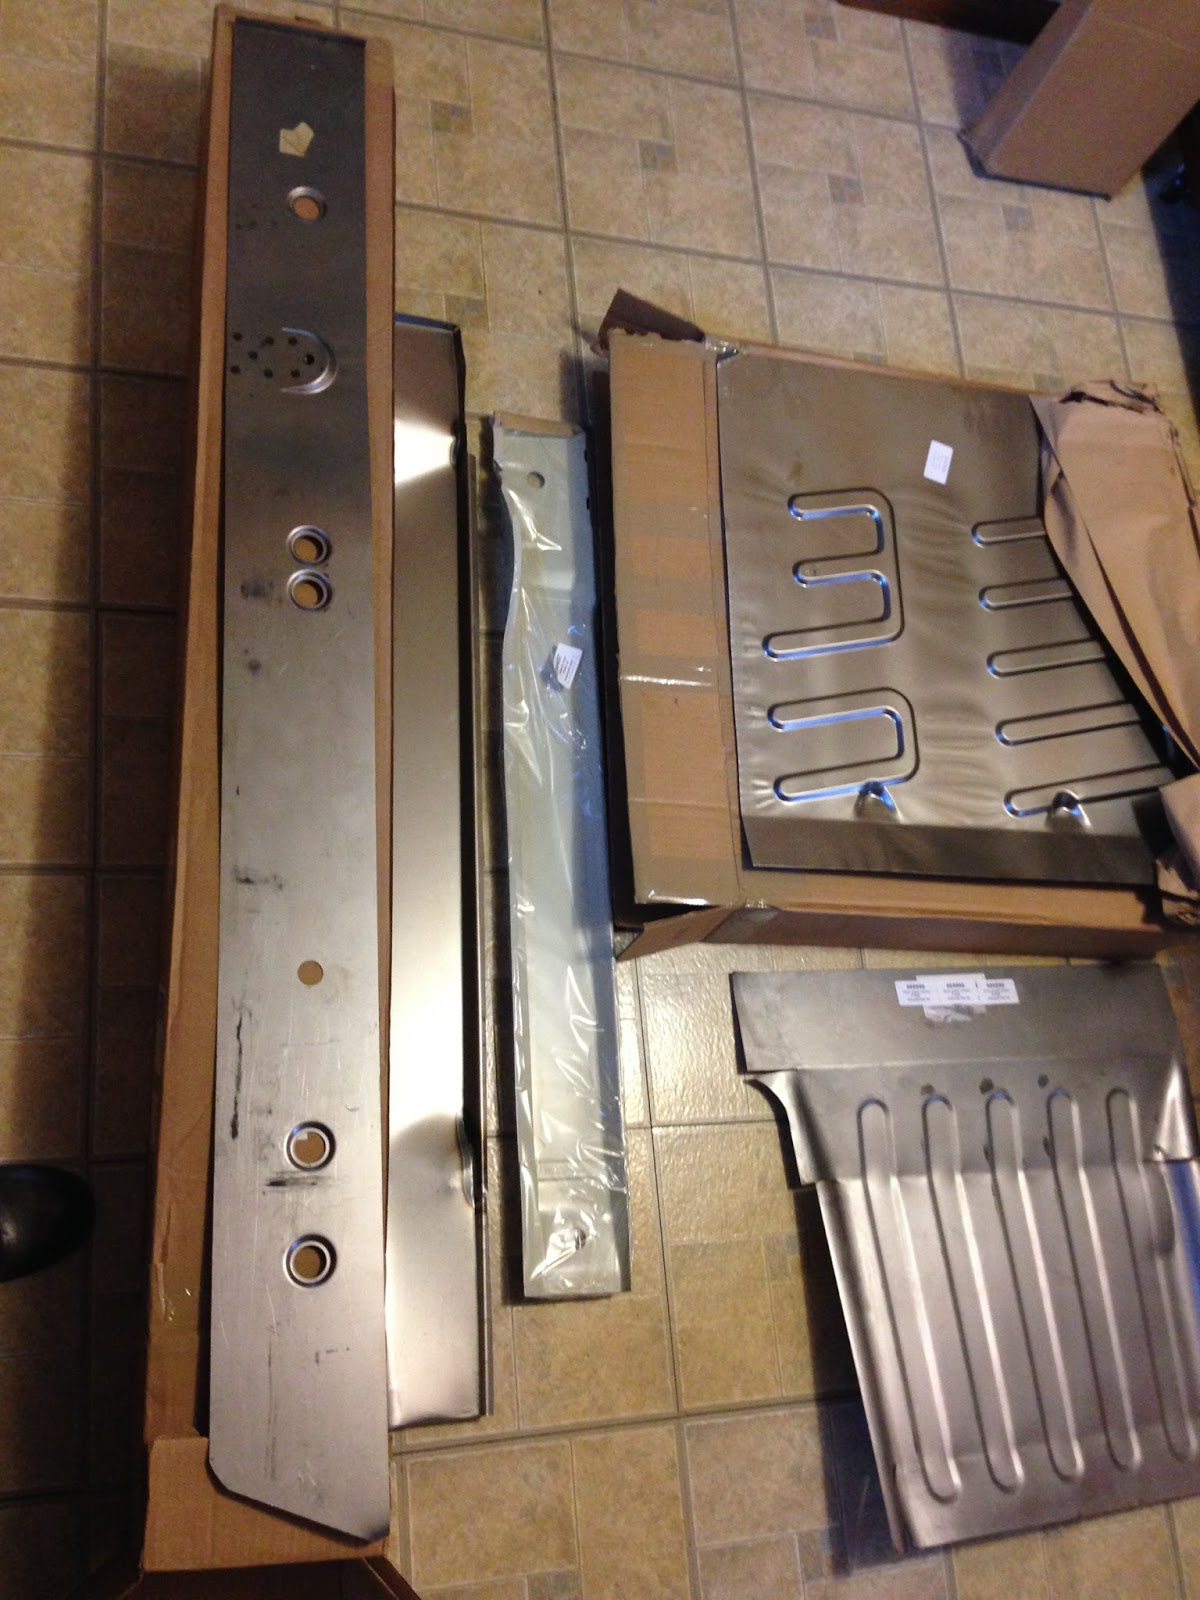
After much waiting, today I finally received the order I had placed for the drivers side floor pans and sill panels. Since mine are practically nonexistent due to the water infiltration in my car, they should be a good starting point for the bodywork.
The panels seem to be decent quality at first glance, though its obvious they will require some work. I haven't trial fitted any of this stuff yet, so my opinion may change. The floor pans like like decent stampings. The sill inner piece looks to be an original OEM Volvo piece. The middle and outer sill pieces look to be hand formed. Right now I think they'll work fine, but they'll need some work on the seams and on some low spots created when they were shaped.
Its already November, so I'm not sure if I'll really get a chance to work on these in the near future. Cold weather is quickly approaching and I don't have a heated garage. Guess we'll find out.
Chronicling the restoration of a 1967 Volvo 1800S P1800.
Saturday, November 4, 2017
Saturday, September 23, 2017
Waiting...
So the Volvo is in waiting at the moment. A few things have happened that have taken priority over its restoration, but I should be working on it again soon. Work has been crazy, I just finished a certification exam for my job, I've needed to do some work on my daily drivers, and I needed to get my Jaguar ready for the St. Louis All British Car Show that took place today. On top of that, I ordered some of the sheetmetal I'll need for the Volvo, and one of the floor pans was only stocked at the supplier's Swedish warehouse, so I'll need to wait several weeks for it to arrive. Once the order comes in though, I'm hoping the weather is still warm enough for me to at least get started on replacing the drivers side floor pans and sill.
![]() |
| My Jaguar XJ6 at the British car show. This was my project before I purchased the Volvo. I know what you're thinking... I'm a glutton for punishment. |
Saturday, August 26, 2017
Rear end removal
The rear was really easy to remove. Basically a few bolts holding it in, remove the driveshaft, and drop it out. The only issue I had was getting the upper shock nuts off. Since they were going to be way too much work for something that wasn't being reused anyway, I just took my sawzall and cut the nuts and stems off. This ended up taking about a minute instead of potentially lots more time if I had worked to remove the nuts with a wrench.
Now the car is essentially completely stripped. There are a handful of small items I still need to remove because they either wouldn't come off or didn't get in the way of removing everything else. I'll use my welder to remove the things that are stuck and the other items should only take a few minutes.
| Rear bumper removal |
| Bad pic, but you can see me dropping the rear axle assembly out the bottom |
Saturday, August 19, 2017
Front end removal
Tuesday, August 15, 2017
Removing remaining trim
This post should catch us up to where I'm currently at with the car. The only thing remaining is to remove the suspension. The plan is to roll the car out of the garage so I can clean my garage bay really well one last time. Then I'll roll the car back in, put it up on jack stands, and remove the front and rear suspension as well as the bumpers. At that point, it will be completely disassembled and will be ready for the cutting wheel.
I looked through my pics and found that I didn't really take any pictures for the majority of the trim removal. Much of it has studs and nuts on the backside. This includes things like the rear fin trim, license plate trim, and turn signals. The drip rail molding was removed very carefully with the rounded side of a bottle opener. The quarter window trim is held in with four screws on each side.
The vertical quarter window trim can be gently pried off. Expect many of the retainers to break when you do this, but the trim won't be distorted. The side trim that runs from the fender to the rear quarter can also be gently pried off, as well as the front badge. The rear badges have clips holding the studs tightly in the trunk compartment. I used some needle nose pliers and a small flat blade screwdriver to get them off, but they can be very stubborn.
I looked through my pics and found that I didn't really take any pictures for the majority of the trim removal. Much of it has studs and nuts on the backside. This includes things like the rear fin trim, license plate trim, and turn signals. The drip rail molding was removed very carefully with the rounded side of a bottle opener. The quarter window trim is held in with four screws on each side.
| Quarter window lower and vertical trim |
The vertical quarter window trim can be gently pried off. Expect many of the retainers to break when you do this, but the trim won't be distorted. The side trim that runs from the fender to the rear quarter can also be gently pried off, as well as the front badge. The rear badges have clips holding the studs tightly in the trunk compartment. I used some needle nose pliers and a small flat blade screwdriver to get them off, but they can be very stubborn.
Wednesday, August 9, 2017
Getting the glass out pt. 2
The next task at hand was to remove the rear glass and windshield. They're both done the same way. First, you'll need to remove the trim work which isn't difficult. For both the windshield and rear glass, you'll find a union piece at the top and bottom middle of the glass. Pry one of them off. The large trim pieces that go half way around each window are simply held in place using a rubber lip on the top of the weatherstripping. Both the weatherstripping and and trim work have a groove that slip into one another to hold it in place. Take your fingers and gently start pushing the end of the trim work towards the center of the window. This should push it out of its groove. Now just work your way around the window until its removed. You'll be able to slide it out of the other union without having to remove it. Repeat for the other side and you're done.
I removed these pieces of glass the same way as the quarter window glass. In other words, I used a box cutter to cut the weatherstripping and then just popped the glass out.
The car looks considerably different without glass in it.
I removed these pieces of glass the same way as the quarter window glass. In other words, I used a box cutter to cut the weatherstripping and then just popped the glass out.
The car looks considerably different without glass in it.
| Peeling away the weatherstripping after cutting. |
| Easier than it looks. |
Monday, August 7, 2017
Getting the glass out
Fortunately for us, the glass in our cars in installed using gaskets. This makes it a bit easier to remove. I started with the quarter window glass. It was pretty easy to remove using a box cutter. I pushed the cutter between the glass and the lip of the weatherstrip and starting cutting at a slight angle. Essentially, you're trying to cut off the outer lip of the seal.
After cutting off the out lip, the window should pop outward fairly easily.
The vent windows were next. Remove the five screws at the top (three large and two small) and the two bolts at the bottom inside the door. Now roll the window down and you should be able to pull the vent window assembly out the top.
The vent window provides the front channel for the door glass, so you're already part of the way towards getting it out. Remove the locating bracket in the top middle of the door (two screws) and any screws holding the window regulator in the door. You should be able to slightly angle the glass and pull it out now. Then, you can pull the regulator through the large hole in the door. Sorry, I guess I didn't take pics of these steps.
| Cutting the seal at roughly a 45 degree angle. |
After cutting off the out lip, the window should pop outward fairly easily.
| Remove the glass and then pull out the rest of the weatherstrip by hand. |
The vent windows were next. Remove the five screws at the top (three large and two small) and the two bolts at the bottom inside the door. Now roll the window down and you should be able to pull the vent window assembly out the top.
The vent window provides the front channel for the door glass, so you're already part of the way towards getting it out. Remove the locating bracket in the top middle of the door (two screws) and any screws holding the window regulator in the door. You should be able to slightly angle the glass and pull it out now. Then, you can pull the regulator through the large hole in the door. Sorry, I guess I didn't take pics of these steps.
Subscribe to:
Posts (Atom)